


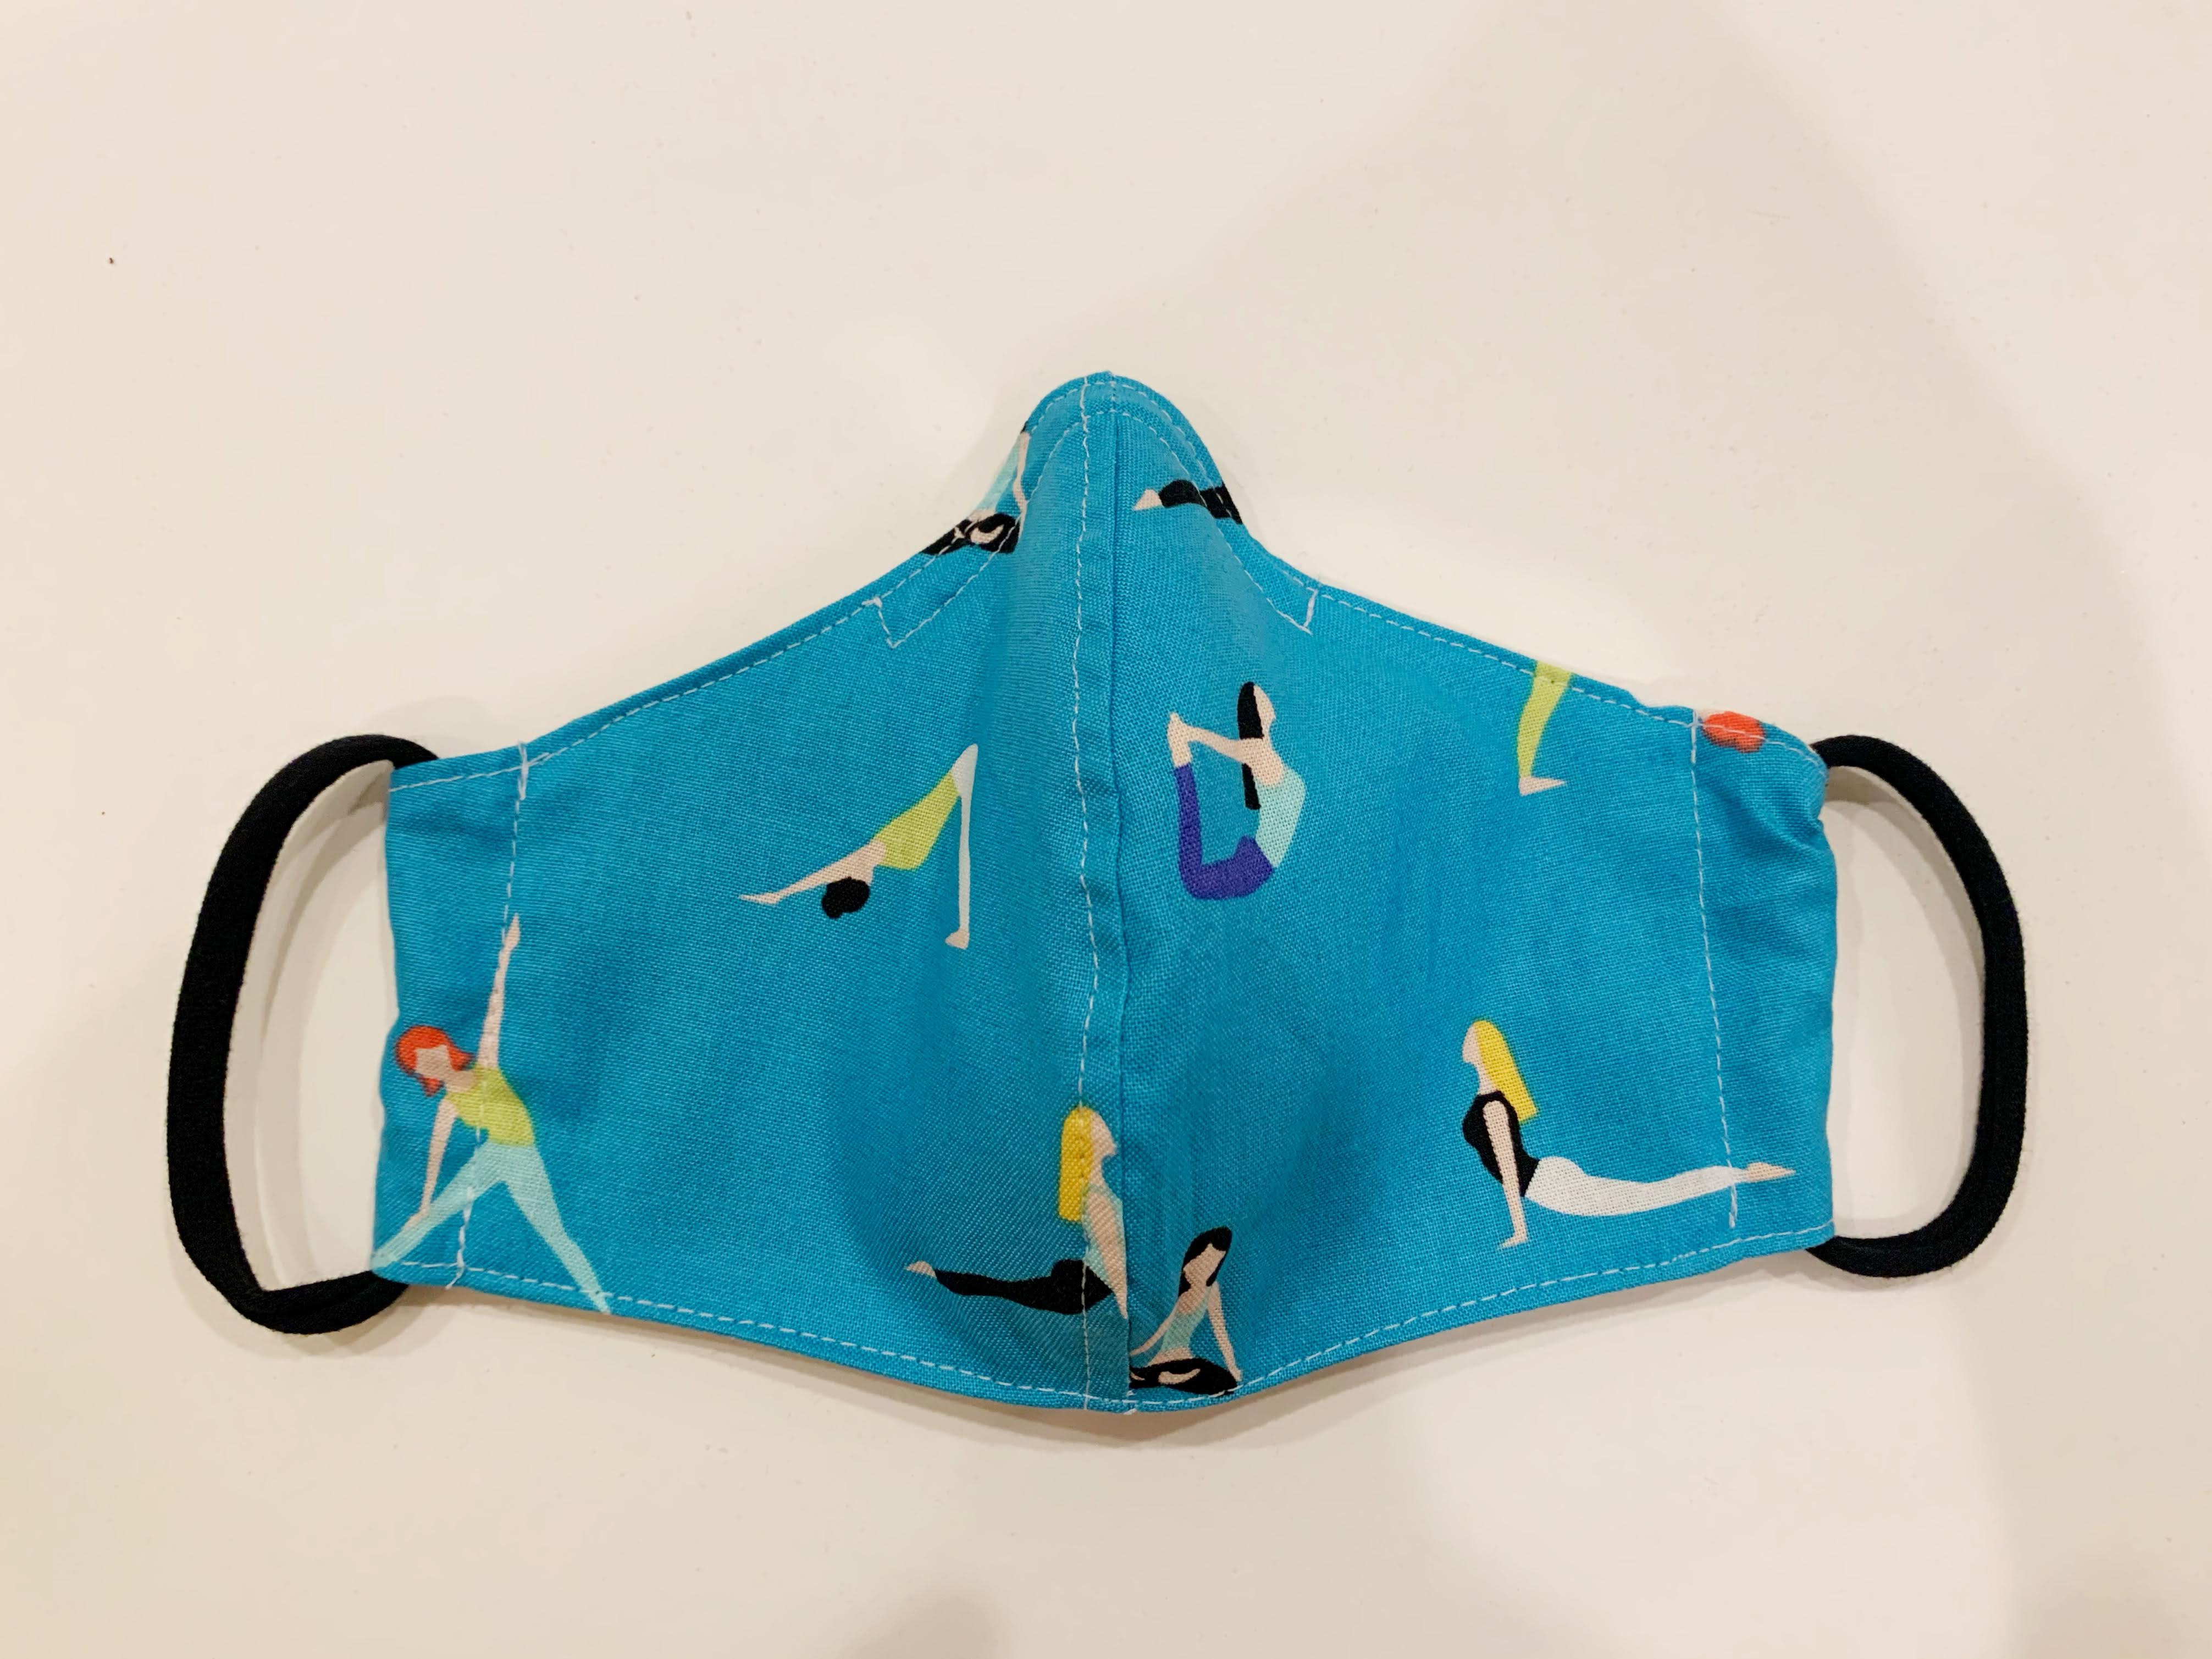
💙😷💙
A free sewing pattern and tutorial for personal and donation use only (not for resale).
Includes three sizes (WOMENS, MENS AND SMALL CHILD).

NOTE: I use a serger to sew this pattern, but it is not necessary. You may use a sewing machine to sew the entire face mask. If you do sew with only a sewing machine, I recommend adding 1/4” to only the ends of both the outer and lining pieces (where the elastic will go through). This way you can double fold and sew that edge to hide the raw edge.
Start by downloading my FREE face mask pattern HERE
MATERIALS:
·
Outside of Mask: Cotton Fabric Print of choice
·
Lining of Mask: Cotton Fabric solid or print of
choice
·
Straps: 2 – 1”x9” rectangles of stretch cotton jersey
knit fabric
·
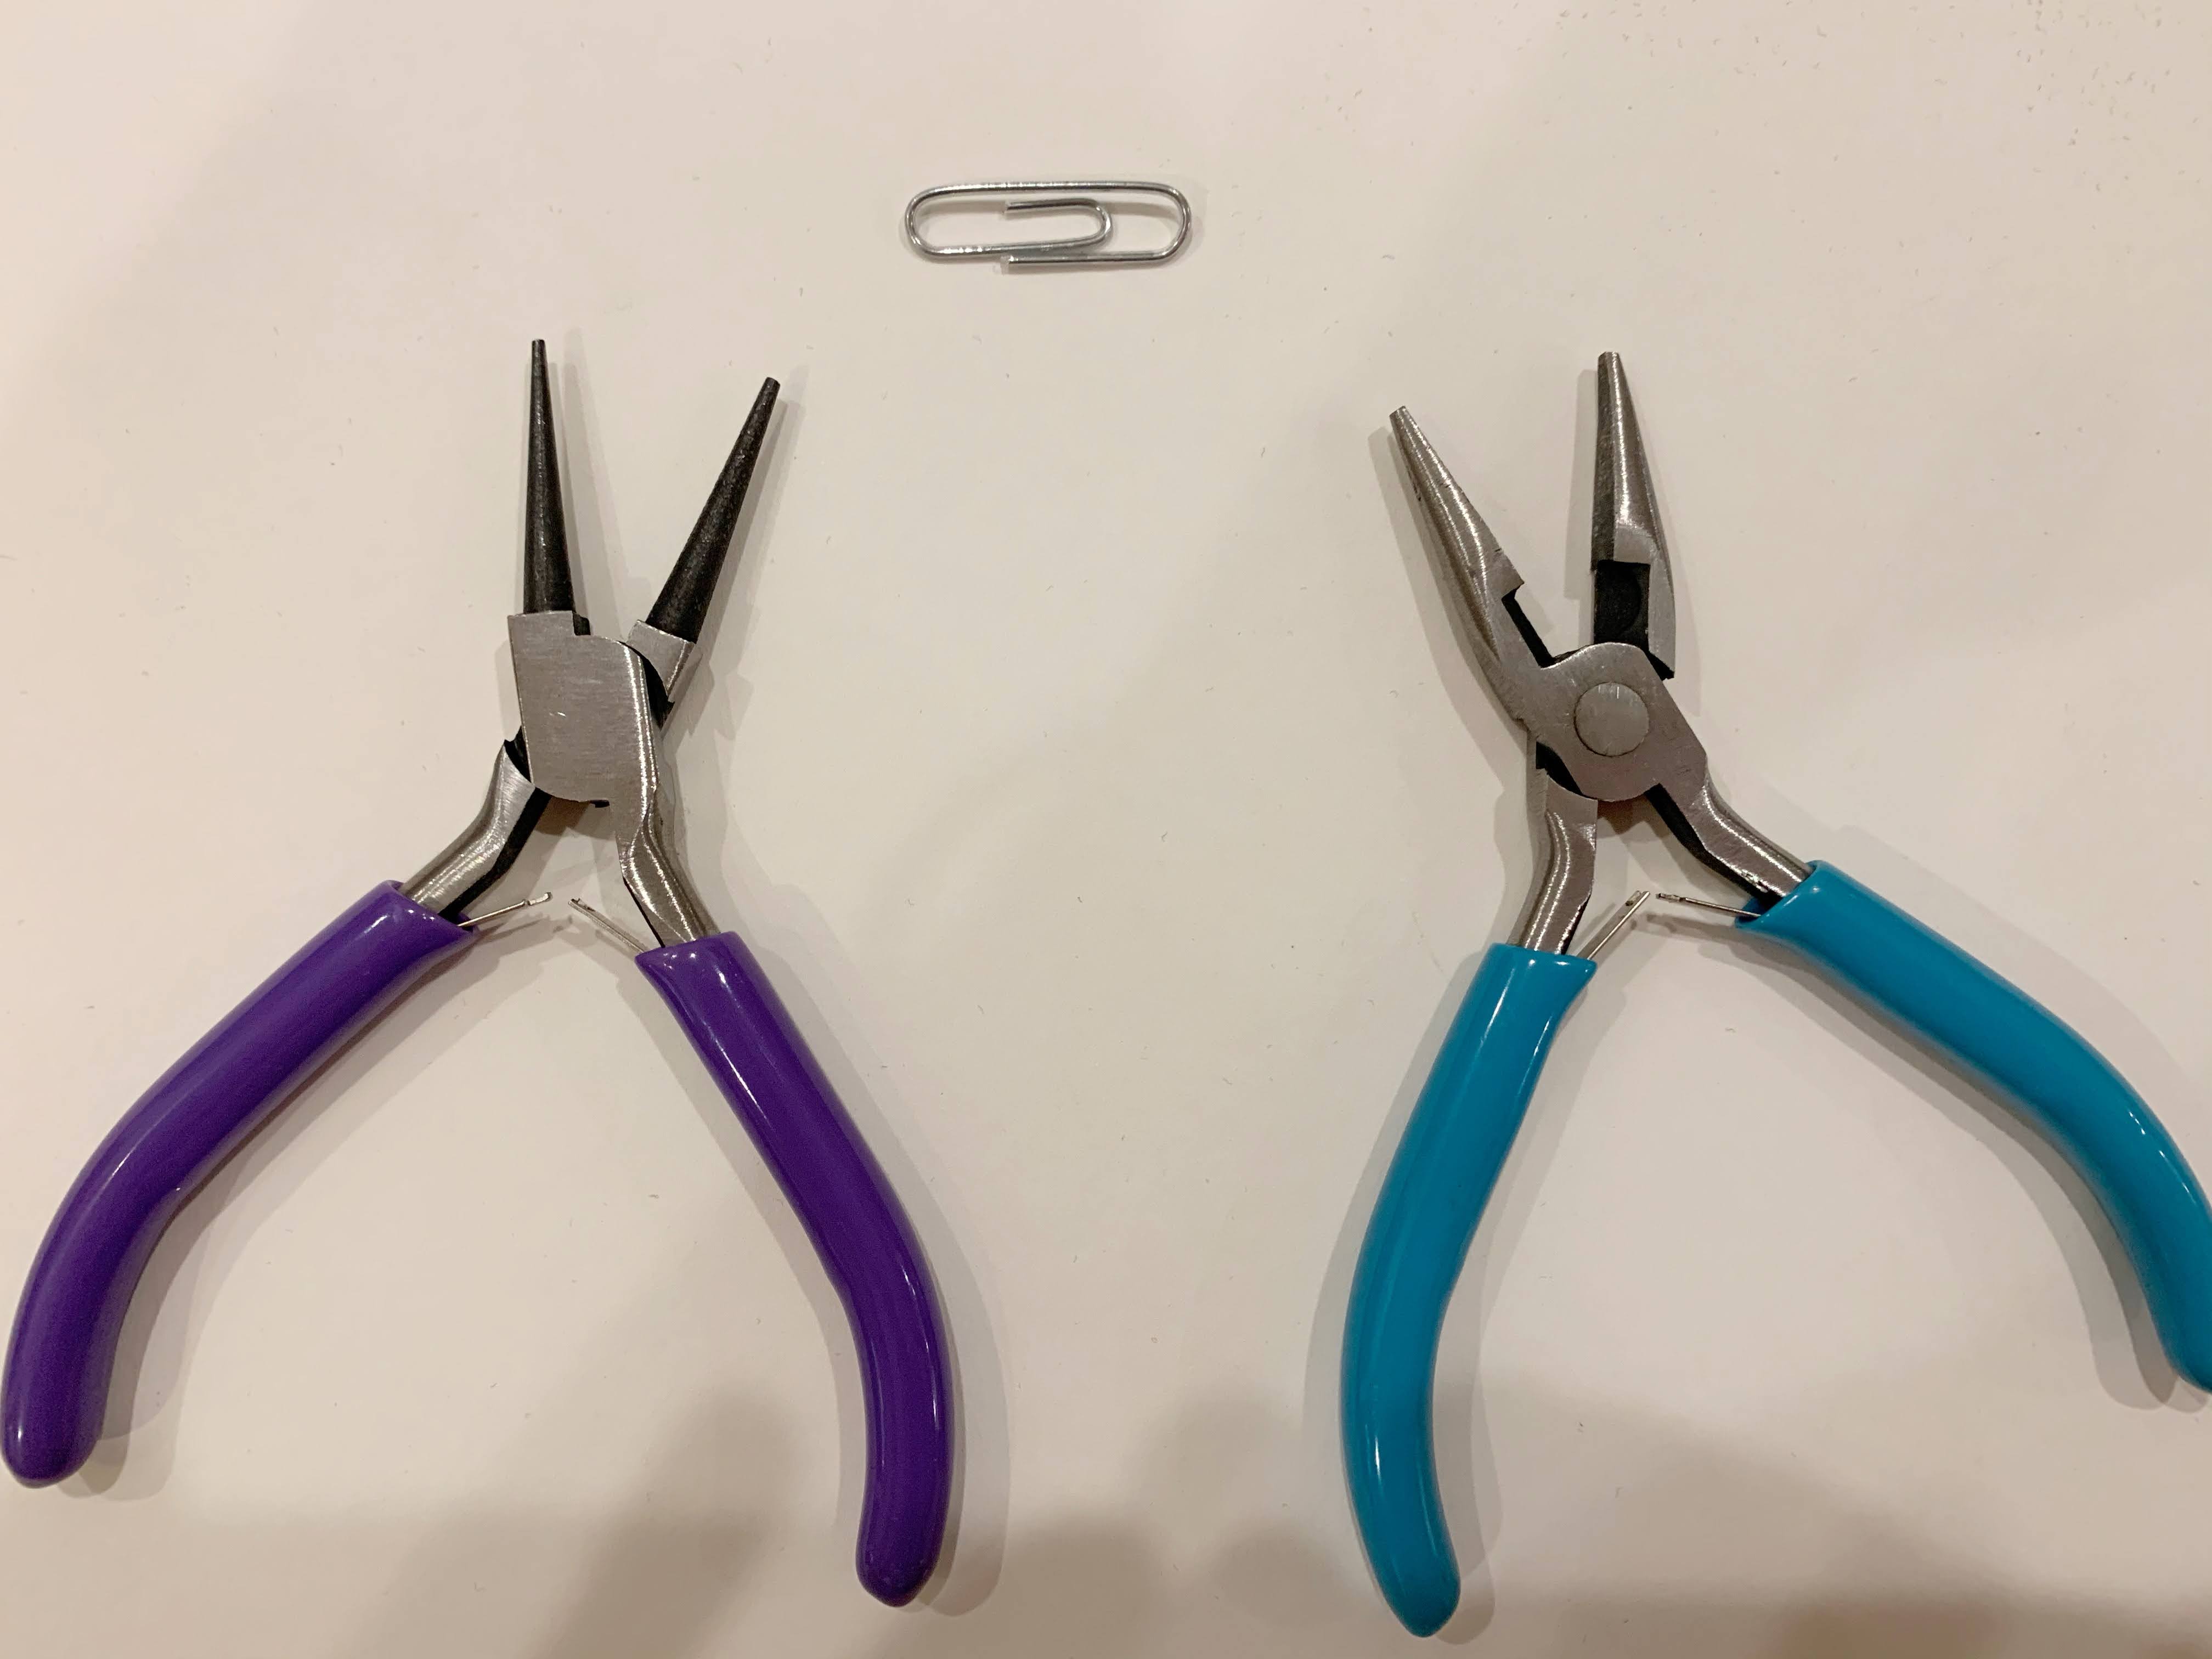
Nose Wire: 1 standard paper clip
SEAM ALLOWANCE: Use 1/4” seam allowance unless otherwise
noted.
Step 1: Cut the pattern. Pin the paper pattern to the fabric. Lay fabric right sides together so you can cut both pieces at the same time. Plus, if they are already arranged right sides together, they are ready to sew😁.

Step 2: Sew the OUTER pieces together. Sew or serge the big curved side (nose to chin). Serge the raw edges of each of the ear sides. (Or if using a sewing machine, you should have added 1/4” to the ear edge. Fold once and press). Press the center seam to the left, press and top stitch. This part is optional, but I find it helps with feeding the nose wire in later.


Step 3: Sew the LINER pieces together. Sew or serge the big curved side (nose to chin). Serge the raw edges of each of the ear sides, just like you did for the outer piece. Here is where it’s different – fold ear side edges once and topstitch in place. (or if only using the sewing machine, you should have added 1/4" to the ear side. Fold TWICE, press and then topstitch).


Step 4: Sew the outer and lining pieces together. Place
outer and liner pieces right sides together. Match your center seams at the
nose and the chin. Pin along top and bottom as needed. Serge or sew both the top
and bottom of mask. Tip: when sewing the top I like to start at the center seam
and sew to ear edge, then switch and sew the other side center seam to other ear
edge. This part of the fabric is on the bias and so it can get shifty and misbehave.
Sewing from the center and out helps with that. Repeat for bottom chin side of
mask.


Step 5: Turn right side out and PRESS. Open your
seams up as much as possible. Remember to iron the center seam while you’re at
it.


Step 6: Topstitch the top and bottom of mask. Topstitch 1mm
away from the edge along the entire top nose edge as well as the bottom chin
edge.

Step 7: Make the elastic casings. Fold the outer ear edge in so it is flush with the lining edge. Topstitch in place.


Step 8: Adding the nose wire. Prep the nose wire by
straightening a standard paperclip. I used flat nose pliers and round nose pliers for this part. Bend both ends of the paper clip to ensure
the don’t poke through your fabric later. Use the straightened paper clip to
center along the nose side. Add 1/8” to the length to ensure you have some wiggle
room. Use pins to mark the length. Sew the left side about 1/4” down and then pivot
the needle to sew the long edge. Leave the right side open. Feed the wire in
between the layers then close the right-side wire opening closed. Bend the wire
at the nose seam and adjust as needed.


Step 9: Add elastic ear straps. I prefer to use
cotton stretch jersey knit fabric for the ear straps. Cut two straps 1” x 9”. Use
a safety pin to thread a strap through each side of the mask. Pull the straps
to pre-stretch them. This will curl the straps. Tie a square knot (right over left,
left over right). The ear strap loop should be about the size of a standard hair
band. Pull tight so the knot gets small enough to feed through the casing. Trim
the elastic tails off and slide the knot inside the casing.


1 comment:
You are awesome!
Post a Comment