


Ya'll are in for a real treat... sure there are lots of online tutorials for kids pants, but here you can print a fabulously FREE pattern for sizes 2T-5T. This is such a versatile pattern. Add ruffles or don't. Crop the legs to capri length or leave them nice and long. Use fun prints, or make them solid. You can even keep it simple, and use it for boys pants!
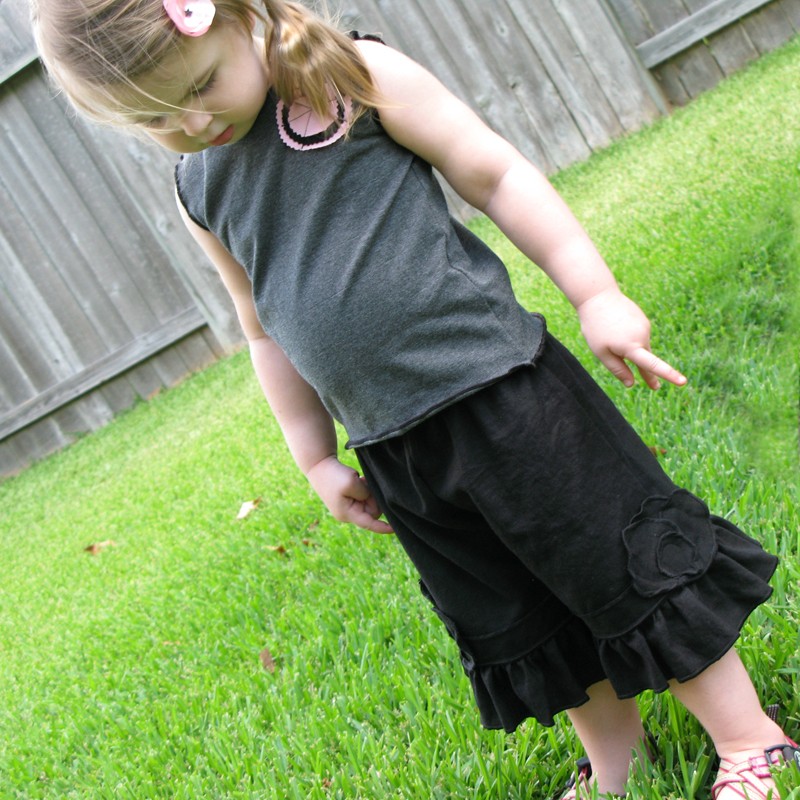
Here's a classy example of capri length, using black linen fabric and a little embellishing with the same linen:
For this tutorial, I decided to use some fun coordinating fabrics from the Wildwood Collection by Erin McMorris, which was graciously supplied by Imagine Fabrics.

Please note, I do not mind if you use this pattern
for personal use, or even to sew and sell your own handmade toddler pants. However, please do
not sell the actual pattern for profit... it is for everyone to enjoy
free of charge.
When printing the pdf pattern, make sure that the "page
scaling" is set to "none". Measure the 1" scale box on your
printout to ensure it measures exactly 1". Cut out and tape the three pattern pieces
together per instruction.
Materials:
♥ 2/3 yard fabric for main pants
♥ 1/4 yard fabric for ruffles
♥ 1" non-roll elastic (measured and cut according to toddler's waist) (approximately 19" for 2T, 20" for 3T, 21" for 4T, 22" for 5T)
Step 1: Cut your pattern pieces. For the main piece, you will fold selvage ends together, then fold a second time. Line up your pattern on the double fold. The pattern does not
include the ruffle piece. For the ruffles, cut two rectangles, measuring 4"
x 42". Here are your pieces:

Step 2: Gather your ruffles by setting your sewing machine
to a long baste stitch. Some sewing machines will gather well by increasing
your upper tension to the highest setting. If not, then use a regular basting
stitch and manually adjust your gathers by pulling on the thread ends and
cinching along the length.

 |
|
Tip: Press ruffles with a hot iron, so the gathers lay flat. This
will help when piecing ruffles to the pant leg.
|
Step 3: Sew your ruffles to the hem of pants. Open the leg
pieces and pin gathers right-side together with pant hems. If your ruffle is longer than the hem, that's
okay, just cut excess ruffle, so it is the same width of pant leg. If the
ruffle is too short, adjust ruffle to length of pant leg. Sew using a 3/8"
seam allowance.


Step 4: Press ruffle seam up and top stitch along top.

Step 5: Sew the pant crotch. Open both pieces and lay
right-sides together. Sew down each crotch side. Unless you are using a serger, I recommend double stitching the crotch seams to reinforce.


Step 6: Sew the pant legs. Lay the pants so the un-sewn
edges of the legs are on the inseam. Pin, being sure to line up the ruffles,
and stitch to make leg casings.


Step 7: Sew the waistband. Fold and press the waistband 1/4"
down all around. Then fold another 1 1/4" and press again. Since the front
and back are the same, choose one of the crotch seams and sew waistband casing
all around, leaving a 2" opening.


Step 8: Insert the pre-measured elastic by using
a safety pin. Be sure that the elastic does not twist. Overlap elastic ends 1
inch and sew a square to secure ends together. Slip a fabric tag in the
opening, then finish stitching the waistband casing closed.


Step 9: Hem the pant legs. Finish the pants by sewing a
1/4" hem on the ruffle hem.


♥ Happy sewing! ♥


31 comments:
Whoa....I was just popping over to make a couple crayon holders and I see another tutorial. You are incredible! Thanks!
Love these! I can't wait to make some for my daughter.
Thanks so much for this free pattern!
I am making some of these tomorrow!! I'm making a 5t, but I winder how I can make them for a 12mo old. Any advice?
@shannah - for 12month, try using the 2t pattern size, then cut your paper pattern about 1/2 inch off the waistband, and about 1 inch off the pant hem. Best of luck!
WOW! This pattern is truly very helpful for me. I am going to make it for my daughter. Of course it’s perfect for her. Thanks
Thank you so much for this tutorial! I made my daughter the capri length pants last night and they turned out perfect!
I have made two pairs so far and love them. All the teachers at work want me to make them for their kids. Thanks.
Thank you so much for this wonderful pattern and tutorial! Turned into the absolute cutest capris! I am so thankful for people like yourself who post clear, easy to follow, and cute patterns for free! I'm new to sewing and your pattern was just perfect for me. Thanks again!
Absolutely love this pattern! I just finished the capri (2T) and they are adorable! I am so thankful for people like yourself who post clear, easy to follow, CUTE patterns that actually turn out the way they should!! Thanks again!!
Super cute Pattern! Clear and easy to follow! Wish I could post a picture of the 2t capris I just finished! Thank you for sharing this!
Thank you so much for this pattern and tutorial! As a beginner, it is hard to find patterns that I can follow without giving up in frustration. In addition to having some darling pants for my niece, this really boosted my sewing confidence!
Thanks so much for this awesome pattern! I have just started sewing and am so excited to have found this. I can't wait to make these for my 4 daughters and pair with a cute t-shirt maybe embellished with a rosette! Eeekkk!
Thanks for the pattern and tutorial!!! This is my "go-to" pattern for ruffle pants!
how much fabric do I need for 18 months ruffle pants? and how can I make It with your 2t pattern ? thank you
For size 18 month, I would just shorten at the hem a couple inches (before adding the ruffle), and use 18" of elastic at the waistband. As for yardage, 2/3 yard is a generous amount, so 1/2 yard would be enough for the smaller size(but still use 1/4 yard for the ruffle).
Thank you so much for this great tutorial! I am very much a BEGINNER at sewing and I was able to make a cute pair of ruffle pants for my daughter thanks to you! :)
What about adding another tier of ruffle making it a double ruffle. Making the 2T size so any suggestions would be helpful.
@Linda Futral - a double ruffle would be adorable. In addition to the two 4"x42" pieces that you cut for the main ruffle, also cut two 3"x42" rectangles to use for the top ruffle. First, hem one long side of each top ruffle. Then layer the 3" and 4" together with the 3"x42" rectangle on top. Baste along the top unfinished edge and gather. then proceed to step 3 of the tutorial.
Love this tutorial! I do have a question though....I am having trouble hemming the pants at the bottom after they are already ruffled....would there be any downside to hemming them to give them the finished edge before I go to ruffle them? Thanks so much! :)
Awesome! Thanks for getting back to me so quickly. And, thanks for the fabulous pattern and tutorial.
@Deanna - You can certainly hem the ruffle piece before you gather and attach it to the pant legs. The only downside would be that the ruffle seams may not match up cleanly at the hem, but since the seams are on the inside of the legs, it won't show too much :)
Thanks for this tutorial! I have been searching for a good one for pants like these and yours if by far the best I have found. Thanks for all the time you put into this.
Just wondered if it would work to hem the ruffle pieces before ruffling it.
@Anonymous- Yes, you can hem the ruffle pieces before attaching. I prefer to do it very last thing, just so it creates a more flawless hem where the ruffle ends meet, but it's a trivial detail :)
Thank you for a clear and easy to follow tutorial. Your sewing talent and attention to detail is appreciated.
You rock! I just made these in no time flat. They turned out super cute in the 5T Thank you so much!
I made these and my daughters rides high in the back, did I do something wrong?
This is a great pattern...just what I was looking for! Thank you!! The pants came out adorable.
Thanks! this is a great easy pattern and the pants came out adorable!
Thank you so much for posting the pattern and wonderful tutorial. I never thought I would be able to make something like this! I have made them for 3 sets of little girls and they have been a big hit with everyone!!
Post a Comment