 I wanted a wallet that carried a lot of cards with no risk of them sliding out. As you can see, the card slots face inward, which means your cards will stay put as long as your wallet is closed. I promise it's a lot easier than it looks so bear with me. Here we go!
Disclaimer: I do not mind if you use this pattern for personal use, or even to sew and sell on a small scale. However, please do not sell the actual pattern for profit... it is for everyone to enjoy free of charge.
Materials:
♥ Main Outer and Inner Pieces: cut two 9"x 5" rectangles (stabilize with fusible interfacing if using quilting cotton)
♥ Inside Bill Lining pieces: cut two 9"x 4 1/2" rectangles (do not stabilize)
♥ Tab: 3 1/2"x 3 1/2" square (stabilize with fusible interfacing if using quilting cotton)
♥ Pockets: 5"x19"cut two (do not stabilize)
Note: you only need to use interfacing for quilting weight cottons. If you decide to use canvas or heavy weight fabric, forge ahead!
Here are your pieces. If you have a rotary cutter and mat, your pieces will look so much nicer than my sloppy scissor-cut pieces:
Make the tab. Stabilize with fusible interfacing. Fold in half and sew the top and side, leaving bottom open. Clip corners, turn right-side out, press and top stitch.
Note: If using a magnetic purse snap, attach before sewing tab.

Make the lining. Lay pieces right-sides together and sew sides and bottom, leaving 3" opening at bottom. Top is completely unsewn.

OPTIONAL: You may skip this step if you want a plain wallet. I embellished this one with ribbon. Lace would be adorable. Also, a quilted patchwork piecing would rock... piece together first then interface finished piecing.

Make the pockets.

Don't use a credit card. It will warp your card and flatten your numbers. Just take my word for it. I used a gift card. Never iron directly on the card.

Think of folding a paper fan... only it's off-set in its folds to create the staggered pockets.

I mostly just eye-balled this part.


Nice pockets. Now flip it over and trim off the excess. Each finished pocket piece should measure 4" x 5".

Now do it again for the other pocket piece.

Attach your pocket pieces to the inner wallet piece.

Quick view of where you should be:

Center and attach the tab.

Sew your outer wallet and inner pocket pieces together along sides and bottom.

You're sewing through some thick layers, so use a 1/2" seam allowance to make sure you catch everything. Then trim down as shown.

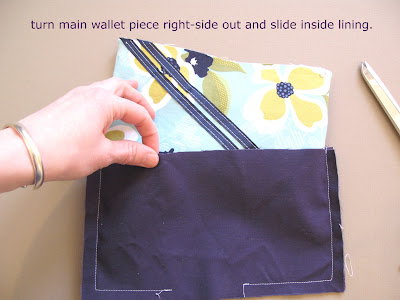
Sew lining to main wallet. Fold bottom of outer piece an inch so it'll fit in the lining pouch.

Sew around top opening. This is a bit awkward feeding through the sewing machine. Use a 1/2" seam allowance here as well.


Crisp corners of outer wallet well before stitching lining closed.

Work your magic with the iron and press those stubborn, thick seams. Top stitch around entire opening.

Give your wallet another good pressing and top stitch along the sides and bottom.

Attach snap. I have an industrial snap press, but you can use sew-on snaps or Velcro. If using magnetic purse snaps, you'll want to attach the snap piece to the tab before sewing the tab.


