Sunday, April 19, 2009

New Dress - Stella Noir

Pin It Now! My dear friend Janna gave me a blackapple stetchbook for Christmas, so I've been using it to stetch out my ideas. I have quite a few other designs on the cutting table, but it's hard to find time to create new things. If it weren't for my stetchbook, I know I'd forget half my ideas. Thanks, Janna for such an extremely practical gift!

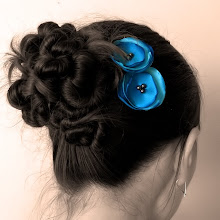
Here is a design I've been sitting on for a while and finally got around to sewing. I call it the Stella Noir Dress, and it is now available for purchase from my etsy shop. I wore it to church today with some aqua blue poppy pins. I'm happy to report that it passed the climbing, drooling toddler test with flying colors :)

Wednesday, April 15, 2009

Pressed Flower Tutorial

Pin It Now! When my brother passed away last month, so many thoughtful people sent gorgeous flower arrangements to the funeral home and my parent's house. Jared's girlfriend mentioned to me that it might be nice if some of the flowers were preserved and framed as a special keepsake. Never in a million years would I have thought of such good idea... Thanks, Aimee! You're definitely getting one : )

One would think that picking up a new hobby under such sad circumstances is insane, but I found it a very therapeutic distraction from all the sadness. Yet, when it comes to flower pressing, there's no putting it off... the flowers must be pressed while they are fresh and alive. That leaves a very small window of opportunity.

I've tried to give you a brief "how to" on microwave flower pressing. Yes, I said MICROWAVE. The benefits of the microwave method are 1) time... hours in comparison to the weeks it takes for the old book pressing method and 2) it captures and preserves the petal colors better.

Supplies:
-fresh flowers and foliage
-4 layers of cardboard (I used 2 priority mail boxes cut in half... that might be a federal offense... shhh... don't tell.)
-2 tissues/Kleenex
-6 layers printer paper
-2 to 4 thick rubber bands
-Perfect Paper Adhesive Matte (I found it in Michael's Craft store in the same section as the ModPodge)
-Krylon UV Resistant Clear (optional... I found this in the art/paint section)
-flat brush
-cardstock or cold pressed watercolor paper (140 lb)

*Please Note: I am a complete novice when it comes to flower pressing. I'm just sharing what I researched on the web and what worked for me. I have a pretty bad track record with plants. I can say that I have a reliable black thumb... that is, if I so much as look at a plant, it will most definately die under my care :) Enjoy!

Layer the boxes, tissue and printer paper as shown below. The petals will be sandwiched in between.

I like to disassemble the flower for pressing, then reassemble it after they are dried. This helps to ensure that the petals get pressed nice and flat and don't curl in the microwave.

It's a good idea to press the thicker pieces of the flower separately... otherwise they'll cause a space in the press, which will cause the other flatter petals to curl and wilt while "cooking" in the microwave. In the picture below, I was lazy and just put the thick daisy center in a corner away from my petals.


You'll have to experiment with the microwaving. Some flowers dry quicker than others. You'll need to repeat the process (zap, cool, zap, cool) 2 to 4 times until the flowers are completely dry and papery. Most of the petals I did only had to be zapped twice.

Don't peek while the press is still hot! After it cools, carefully undo your press and peel back the paper to see if your flowers are dry. If they're still wet, repeat process.
Here are the adhesives, so you know what to look for in the store.
Now is the fun part! Decide how you want your flowers arranged and start gluing. When it's dry, apply a coat of either the Perfect Paper Adhesive or the Krylon UV Resistant Spray. This will help protect your flower from fading in the sun. You can also have your art framed using a special UV resistant glass.


Monday, April 13, 2009

Easter Dolls

Pin It Now! Aren't they cute together? Seriously, it looks like Darth has a soft side when he's cuddling up to a cute little blond dolly. These are the dolls I made as the kids' easter gift. Denny had seen me making Ashlyn's doll, so he knew I was going to sew him something, too. All week he kept trying to guess... is it a bunny? A dog? Finally, I told him that I was making him a blue princess doll (because blue is his favorite color, of course). He's use to my teasing, but I think part of him wondered if I was telling the truth. It was a quick and sloppy sewing job; I didn't even draw out the pattern first... just started cutting. Oh well, Denny could tell it who it was and loves him, so that's all that matters, right?
For Ashlyn's doll, I used The Black Apple doll pattern here. I made another black apple doll for Ashlyn last year with a painted face, but I guess my daughter drools too much in her sleep, because it's starting to bleed out. So for this doll, I played it safe and embroidered her facial features.

Tuesday, March 31, 2009

My brother Jared

Pin It Now! My youngest brother, Jared passed away Sunday, March 22, 2009. He was only 22 years old, and he died of a drug overdose from accumulated oxycontin. My mom called me with the news the same day it happened, and I drove the 5 hours from my home in Houston to Baton Rouge the next morning. Ironically, I had just returned from a leisurely visit from Baton Rouge only the day before Jared died. I am so grateful that I had those last good memories with him. We had a family dinner together for my birthday on March 16th, and we all just sat around the table laughing and enjoying each other’s company. My kids loved their uncle, and he was always good about playing and wrestling with them.

We all knew about Jared’s addiction… he was open about it and expressed to us his desire to quit. I remember him telling me that oxycontin was “better than heroine”. Everyone tried to help him, but he was just so deep and had become a slave to the drug. He was scheduled to check into rehab again the very next day, and wanted one last high. So many emotions and questions have run through me this past week. Did he want to die? Could he have quit drugs if he tried? Where did he stand in his faith and did he truly want to change? Surprisingly, a lot of the answers came the same week that he passed, which brought me an immense amount of comfort and understanding. I know that he is in good hands. He will be my brother forever and I know that our family ties are eternal.

I’d like to share a memory of Jared. He and my other two brothers were little “Tom Sawyers”. Someone would do well to write a book about all their crazy adventures growing up… falling out of 50 foot trees, biking accidents, getting run over by a car, and eating their pet iguana. Yes, the emergency room knew my brothers on a first name basis. When I was 18 years old my parents left my older sister and me to care for my younger brothers while they were out of town for a few days. One morning, my sister and I woke up to an empty house… no sign of any of my three brothers. We just thought the punks were taking advantage of our parents being out of town and snuck out to play with their friends. A few hours later we got a call from our brother John (17) that they were all at the hospital. Apparently, Jesse (14) and Jared (11) had captured a highly poisonous cottonmouth snake. These clever boys decided that they were going to MILK the snake for its venom to sell. Jared, of course, got bitten in his “milking” attempt. I guess they woke up my brother, John to drive them to the hospital instead of us because he wouldn’t yell at them as much. Luckily, Jared was fine… his finger turned black, stopped growing and lost all feeling for the rest of his life, but he was alive. My parents were pretty upset to say the least. It’s a fun story to tell because it illustrates Jared’s carefree and fun spirit so well.

I miss him so much. This past week has been so heartbreaking for my entire family, but I am so touched by the amazing outpouring of love from church members, friends, and neighbors. Thank you for all the kindnesses you have shown to my family.

Saturday, March 7, 2009

Pinwheels make me giddy

Pin It Now!
♥♥♥
Pinwheels on your shoulder
Pinwheels in your hair
Pinwheels on baby and me
Pinwheels everywhere!
♥♥♥
That was about the extent of my poetic abilities. Don't ask me to try to rhyme anymore or I'll hurt my brain, go insane and end up flying a plane to Spain in the rain or some silliness. Anyhoo, these are some fabulous mother/daughter shirt and dress sets that I made for a custom order. I use to offer these in my Etsy shop, but there didn't seem to be a big interest for them so I discontinued them. I never understood why more women didn't go nutso over them... mommies and their daughters wearing matching outfits is the cutest thing ever!
These fabric pinwheels are so fun to make. They button onto the shirt so they can be removed before washing.

As a bonus for this order, I included matching pinwheel hair bobby sets. Once again, cutest. thing. EVER!

Thursday, February 26, 2009

Pin It Now! I really stink at this blogging thing. I'm not even going to try and pretend to have something enlightening to share with the world today. Instead, I'll keep it short and sweet, baby... look at this stuff I made, yo.

Pink Tutu and Leotard (this is going to be a birthday gift for Ashlyn's friend who's turning 2 years old.)

Ruffle apron. Custom order for my rad sis-in-law. I did an etsy trade with her for some of her awesome decals.

Matching Poltholder.

MY apron. For me. All mine. Finally! I'm going to wear it all day to make up for lost time. I'll probably sleep in it too.

Leather Coptic handbound books I made for my brother and bro-in-law for belated Christmas gifts.

Wednesday, February 11, 2009

Free Reversible Hostess Apron Pattern

Pin It Now!
I was asked to teach a sewing class at church, so I thought it would be fun for the ladies to make an apron. Aprons are great for all levels of sewing, plus it gives a beginner sewer the opportunity to venture into ruffles, pockets and pleats in a non-intimidating way.

I created the apron pattern below for your enjoyment. Please forgive me for the lack of detail, but for the purpose of my class, I tried squeezing all the instructions onto one page. I do not mind if you use this pattern for personal use, or even to sew and sell the aprons. However, please do not sell the actual pattern for profit... it is for everyone to enjoy free of charge.
♥♥♥♥♥♥♥♥♥♥♥♥♥♥♥♥♥♥♥♥♥♥♥♥♥♥♥♥♥♥♥♥♥♥♥♥♥♥♥♥♥♥♥♥♥♥♥♥♥♥♥♥♥♥♥♥
Materials List:- ½ yard each of two coordinating Cotton Fabrics (It is recommended that you wash and iron your fabric prior to sewing)- ½ yard solid cotton fabric or muslin
- Matching thread
- OPTIONAL: Any trims, ribbons or buttons you would like to use to customize your apron
♥♥♥♥♥♥♥♥♥♥♥♥♥♥♥♥♥♥♥♥♥♥♥♥♥♥♥♥♥♥♥♥♥♥♥♥♥♥♥♥♥♥♥♥♥♥♥♥♥♥♥♥♥♥♥♥