You're going to love these. They're fast and simple to make and so dang cute! Our
church had a Christmas dinner for the ladies, and I made an assortment of ornaments so each lady could take one home with them that night. I mostly did wool felt heart ornaments and only did a dozen of these birds, but they were by far the quickest to be swiped up. Who knew? So here you go!
Materials:
♥Scraps of cotton fabric
♥Polyfil stuffing
♥Ribbon, jute or lace
Instructions:
Step One: Use the pdf template below to cut your pieces (2 bird sides and 1 underbelly piece). You'll want your two bird sides to be opposites, so layer that fabric right sides together and cut it out at the same time so they mirror each other. Use fun coordinating fabrics.

Step Two: Cut an 8 to 10 inch piece of ribbon, jute or lace and fold in half. (I used jute and tied my ends together, but I don't recommend knotting jute... it was a pain to sew over.) This will be the hanger for your ornament. Just ignore that knot... I'm too lazy to retake the picture.

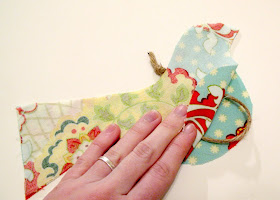
Step Three: Put the 2 bird sides right side together and place the hanger as pictured in between the layers. Pin it in place if you must.

Step Four: Using a 1/4 inch stitch, sew along the entire top of the bird sides from beak to tail. Always sew beak to tail.

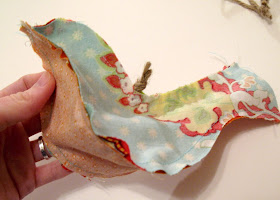
Step Five: Open up and match the underbelly piece right sides together. Pin if you must. Sew down each side being careful not to catch your ribbon hanger. You'll always want to sew from beak to tail in case the pieces don't match up perfectly... don't worry about it, you'll be trimming down the tail later.

This is how it looks after it's sewn (wrong sides out).
 Step Six:
 Snip along the bird's neck and back so the seam will lay nice when it's turned right side out.

Step Seven: Turn right side out from the tail and stuff well with polyfil. Be sure to stuff the head really good first so it gives the head and beak a nice shape. These take a surprising amount of stuffing, but they definitely look best when well stuffed.

Step Eight: Use ribbon or lace to tie off tail. Make a cute little bow.

Step Nine: Use pinking shears to trim tail even. Or if you don't have pinking shears, just tuck end and sew closed.


